
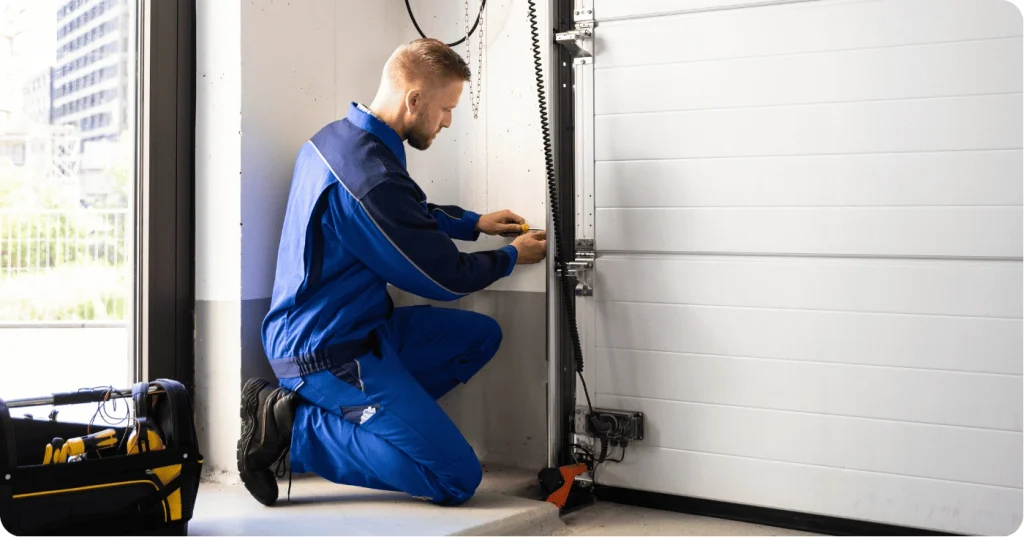
Garage door installation looks easy from the outside. The panel goes up, tracks get bolted on, spring gets tensioned, done. Reality’s a lot messier. It’s one of the more physically demanding and genuinely dangerous DIY projects a homeowner can take on, mostly because of the torsion spring holding the whole thing up under real tension.
Knowing what installing a garage door actually involves does two things. Sets expectations straight for anyone attempting it themselves. And explains why so many people end up calling a professional halfway through instead of finishing solo.
A ten minute tutorial video makes this look way faster and simpler than it actually is. Editing cuts out the parts that eat the most time and carry the most risk, and that’s exactly what sets people up for a rough surprise once they’ve actually opened the box.
What Installing a Garage Door Actually Requires
A full install runs through several distinct stages. Skip steps or rush them, and that’s where most DIY installs fall apart.
- Removing the old door and disconnecting the existing opener and springs safely
- Assembling the new panels, usually section by section on the ground first
- Installing vertical and horizontal tracks along the frame
- Attaching hinges, rollers, and the bottom bracket to each panel
- Mounting the torsion spring system and setting proper tension
- Connecting the opener and testing full range of motion
Each stage leans on the one before it being done right. A track slightly out of alignment early causes binding and uneven movement once everything’s assembled, and catching that after the fact usually means undoing several finished steps just to fix it.
Tools and Preparation Before Starting
Beyond the standard toolbox, a few specialized items actually matter here:
- Winding bars sized specifically for the torsion spring
- A level worth trusting, for checking track alignment
- Clamps to hold panels steady during assembly
- A stepladder tall enough to reach the top track without stretching
- Safety glasses, since spring and hardware work throws debris around
Clear the garage space fully before starting. A door weighing anywhere from 130 to 250 pounds fully assembled turns clutter into a real hazard, especially once panels start getting lifted into place one at a time.
Read the manufacturer’s instructions start to finish before touching a tool. That step alone catches most common mistakes early. Hardware varies enough between manufacturers that instructions for one brand don’t always carry over cleanly to another, even when the general process looks about the same on paper.
The Torsion Spring Is Where Most DIY Installs Go Wrong
This gets its own section for a reason. It’s genuinely the most dangerous part of the whole project. A torsion spring holds enough stored energy to cause serious injury, or worse, if it lets go suddenly during winding or unwinding. Professional installers use specific winding bars and a set process precisely because there’s so little room for error here.
Anyone attempting install garage door work themselves should really think twice about handling spring work solo, even if the rest of the job feels doable. Confidence from other home projects doesn’t transfer over safely to this one.
People who’ve done electrical work, plumbing, even framing, sometimes assume that experience carries over here. It doesn’t. The physics involved are specific enough that general handiness doesn’t replace knowing exactly how much tension a given door’s weight and size actually calls for.
Step-by-Step Overview of the Installation Process
Once the old door and hardware are fully out, the new install generally goes:
- Mount track brackets to the frame, checking level carefully before anything else gets attached
- Set the bottom panel first, hinges and rollers on before it goes into the tracks
- Stack and connect each panel above the last, checking level and alignment at every stage
- Mount the torsion spring system and tension it to the door’s specific weight and size
- Connect the opener, then test the full system for smooth, even movement
A door that binds, sticks, or moves unevenly during testing points back to an alignment problem earlier in the process. Catching that during testing beats catching it after a few weeks of actual use.
Weather stripping and bottom seals go on near the end, once the door’s confirmed moving smoothly. Skip that step or rush it, and function doesn’t suffer right away, but drafts, water getting in, or pests finding gaps around the bottom edge show up later.
When Garage Door Install Services Make More Sense Than DIY
Garage door install services exist for real reasons, not just convenience. A few situations tend to push people toward calling someone partway through a DIY attempt:
- Older home frames that have shifted, needing adjustments standard instructions don’t cover
- Insulated doors, heavier than basic panels, raising injury risk during lifting
- New electrical work for the opener, easy to get wrong without the background for it
- A torsion spring system that needs replacing right along with the door
A professional install usually comes with a warranty on the work itself, separate from whatever warranty covers the door and hardware. That matters if alignment or function goes sideways down the line, since a DIY job typically has no safety net if something surfaces months later.
Garage door install services also just move faster through repetition. What eats most of a day for a first timer takes someone who’s done it repeatedly a fraction of that time, since the troubleshooting moments that slow a DIY attempt down rarely come up for someone who’s already seen the same issue before.
Choosing the Right Door Before Installation Starts
The install changes a bit depending on the door type, and picking the right one before ordering saves a lot of headaches later. Sectional doors, horizontal panels connected by hinges, are by far the most common residential option, and the type most of this guide focuses on.
Steel doors run lighter and are generally easier to handle solo compared to wood or heavier insulated options. Wood looks great but weighs more and needs careful handling to avoid warping or damage during setup. Insulated steel sits in between, better efficiency, more weight to deal with while lifting.
Matching the new door’s dimensions exactly to the existing frame opening matters more than people expect. Even a small mismatch in width or height means the tracks won’t align right, turning into a bigger headache than double checking measurements before ordering ever would have been.
Common Mistakes That Slow Down a DIY Install
A handful of issues show up over and over in DIY garage door projects:
- Skipping the level check between panels, which compounds into real misalignment by the top
- Under tensioning or over tensioning the spring, either way causing uneven movement
- Forgetting to lubricate rollers and hinges before the first full test
- Rushing opener installation without confirming the door balances on its own first
That last one matters more than it sounds. A door should stay roughly in place when lifted halfway by hand with the opener disconnected. Slams shut or flies open on its own? Spring tension’s off, and that needs fixing before the opener gets connected at all. An opener fighting against badly balanced springs burns out way faster than it should.
Garage Door Repair Versus Full Replacement
Not every problem needs a full install. Garage door repair covers a lot before replacement becomes the better call, worn rollers, a damaged panel, a misaligned track, a failing spring on an otherwise sound door. Not sure whether to repair or actually install garage door replacement? Start with a professional inspection instead of guessing at it.
FAQS
A door that’s structurally fine but dealing with one of these usually runs a lot cheaper to fix than replace outright. Full replacement starts making sense once the door’s old enough that matching parts get hard to find, once a few systems start failing at the same time, or storm damage hits the panels harder than a simple fix can handle.
How long does installing a garage door typically take?
Four to six hours if someone’s done it before. First timer? Plan on a lot longer, mostly from figuring stuff out as you go, not the physical work itself.
Is it safe to install a garage door without professional help?
Most of it’s fine if you’re already comfortable with home projects. The spring’s the real exception. That part carries real injury risk and is worth handing off to someone trained for it.
What tools are essential for garage door installation?
Winding bars sized for the spring, a level you can actually trust, clamps to hold panels steady, and the usual wrenches and drivers. Covers most of it.
When should I call for garage door repair instead of a new installation?
If the door’s still sound and it’s just rollers, tracks, springs, or one damaged panel, repair almost always beats tearing out the whole thing.